Skip to content
Home » System On Modules » In-Depth Analysis of NVR-Advancements in Video Surveillance

In-Depth Analysis of NVR-Advancements in Video Surveillance

this picture is show neardi LPA3588 NVR design 1

NVR (Network Video Recorder) is a network-based device used to record and store video data from IP cameras. Unlike traditional DVRs, NVRs process video digitally, offering better image quality and enhanced data processing. NVRs receive video from IP cameras over a network, then compress, store, and manage the data. Users can remotely access and control the system via the network.

Technical Parameters

NVR Advantages

How to build an NVR system?

1. First, you need to prepare a Neardi RK3588 embedded computer and update it to the latest firmware.

this picture is show how to use neardi LPA3588 build an NVR system 1

Create an nvr directory and clone moonfire-nvr, as shown below.

mkdir nvr

cd nvr

git clone https://github.com/scottlamb/moonfire-nvr.git

this picture is show how to use neardi LPA3588 build an NVR system 2

1.) sudo apt-get install build-essential libsqlite3-dev pkgconf sqlite3 tzdata curl

2.) curl -fsSL https://deb.nodesource.com/setup_21.x | sudo -E bash – && sudo apt-get install -y nodejs

3.) sudo apt install cargo npm

Enter the nvr/moonfire-nvr/server directory and execute the following commands:
neardi@LPA3588:~/nvr/moonfire-nvr/server$ cargo test
neardi@LPA3588:~/nvr/moonfire-nvr/server$ cargo build –release
neardi@LPA3588:~/nvr/moonfire-nvr/server$sudo install-m 755 target/release/moonfire-nvr /usr/local/bin
neardi@LPA3588:~/nvr/moonfire-nvr/server$ cd ..

For reference: https://github.com/scottlamb/moonfire-nvr/blob/master/guide/build.md

After successful compilation, the following figure is shown:

this picture is show how to use neardi LPA3588 build an NVR system 3

Enter the moonfire-nvr/ui directory and execute the following commands:
neardi@LPA3588:~/nvr/moonfire-nvr/ui$ npm install
neardi@LPA3588:~/nvr/moonfire-nvr/ui$ npm run build
neardi@LPA3588:~/nvr/moonfire-nvr/ui$ sudo mkdir /usr/local/lib/moonfire-nvr
neardi@LPA3588:~/nvr/moonfire-nvr/ui$ cd ..
neardi@LPA3588:~/nvr/moonfire-nvr/ui$ sudo rsync –recursive –delete —
chmod=D755,F644 ui/dist/ /usr/local/lib/moonfire-nvr/ui

After successful compilation, as shown in the above figure:

this picture is show how to use neardi LPA3588 build an NVR system 4

1.) Add the moonfire-nvr user, as follows:

$ sudo useradd –user-group –create-home –home /var/lib/moonfire-nvr moonfire

nvr

2). Create the moonfire-nvr configuration file

sudo vim /etc/moonfire-nvr.toml, add the following content:

[[binds]]

ipv4 = “0.0.0.0:8080”

allowUnauthenticatedPermissions = { viewVideo = true }

[[binds]]

unix = “/var/lib/moonfire-nvr/sock”

ownUidIsPrivileged = true

3.) Initialize moonfire-nvr

Execute the following command:

neardi@LPA3588:~/nvr/moonfire-nvr$ sudo -u moonfire-nvr moonfire-nvr init

7. Configure Camera
First, make sure moonfire-nvr cannot be stopped, otherwise the camera cannot be configured. For how to start and stop the moonfire-nvr service, please refer to Section 8.
Execute the following command in the terminal to open the moonfire-nvr UI to configure the camera:
neardi@LPA3588:~/nvr$ sudo -u moonfire-nvr moonfire-nvr config 2>debug-log

this picture is show how to use neardi LPA3588 build an NVR system 5

Configure video storage path
1.) Select “Directories and retention” from the menu, configure the video storage path, enter: /var/lib/moonfire-nvr/sample, as follows:

this picture is show how to use neardi LPA3588 build an NVR system 9

Add cameras
Return to the main menu, select Here, 2 network cameras are added, as follows:

this picture is show how to use neardi LPA3588 build an NVR system 6

Here, 2 network cameras are added, as follows:

this picture is show how to use neardi LPA3588 build an NVR system 7

Add users
Return to the main menu, select “Users”, as follows:

this picture is show how to use neardi LPA3588 build an NVR system 8

The following method and steps are used to create and start the service:

sudo vim /etc/systemd/system/moonfire-nvr.service, add the following:

[Unit]

Description=Moonfire NVR

After=network-online.target

# If you use an external hard drive, uncomment this with a reference to the

# mount point as written in `/etc/fstab`.

# RequiresMountsFor=/media/nvr

[Service]

ExecStart=/usr/local/bin/moonfire-nvr run

Environment=TZ=:/etc/localtime

Environment=MOONFIRE_FORMAT=systemd

Environment=MOONFIRE_LOG=info

Environment=RUST_BACKTRACE=1

Type=notify

# large installations take a while to scan the sample file dirs

TimeoutStartSec=300

User=moonfire-nvr

Restart=on-failure

CPUAccounting=true

MemoryAccounting=true

BlockIOAccounting=true

[Install]

WantedBy=multi-user.target

After that, execute the following command to start this service:

neardi@LPA3588:~/nvr$ sudo systemctl daemon-reload

neardi@LPA3588:~/nvr$ sudo systemctl enable –now moonfire-nvr

The following command is to start/stop the moonfire-nvr service:

neardi@LPA3588:~/nvr$ sudo systemctl start moonfire-nvr

neardi@LPA3588:~/nvr$ sudo systemctl stop moonfire-nvr

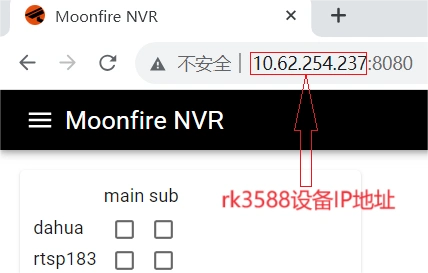
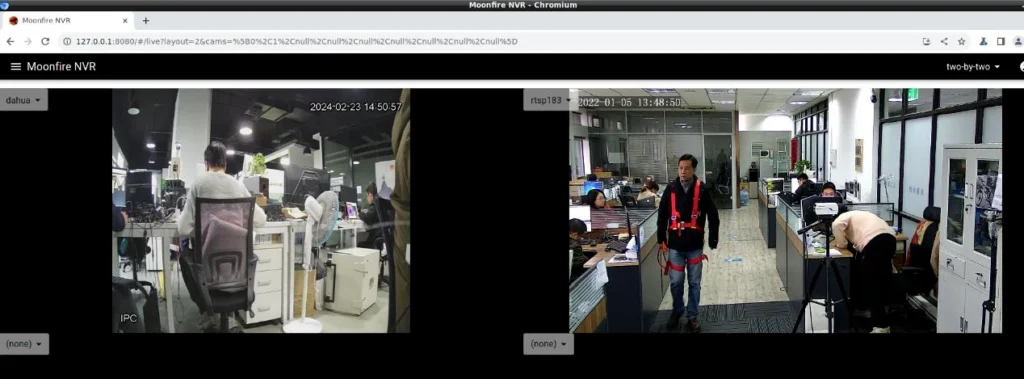
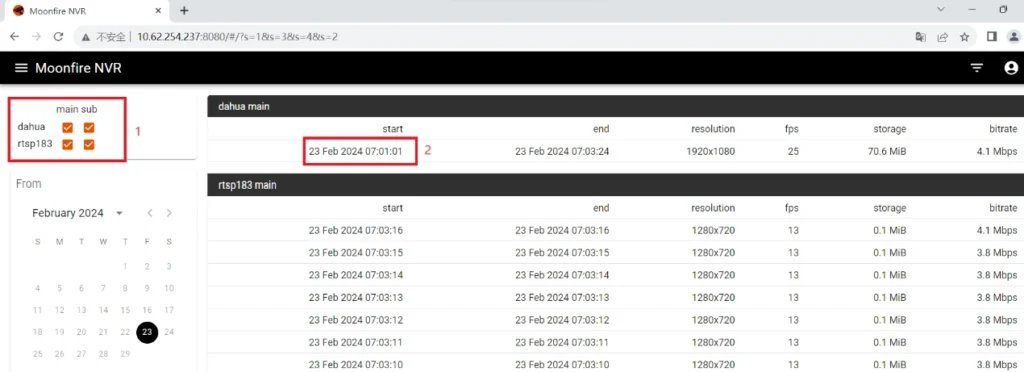
After starting the moonfire-nvr service, you can open the device IP address in the browser (google chrome/Microsoft Edge) to verify whether it is successful (according to your actual rk3588 device IP, here is 10.62.254.237)

http://rk3588_ip:8080, The successful results are as follows:

this picture is show how to use neardi LPA3588 build an NVR system 10

9. Display Camera video stream

View the camera video stream directly on the device

Here, first install the browser on the RK3588 device, as follows:

sudo apt install chromium-browser

this picture is show how to use neardi LPA3588 build an NVR system 11

Then open the terminal on the RK3588 desktop and enter the following command:

chromium, as follows:

this picture is show how to use neardi LPA3588 build an NVR system 12

This will open the browser, enter http://127.0.0.1:8080 in the browser address, as follows:

this picture is show how to use neardi LPA3588 build an NVR system 13

View the camera video stream on the PC

Make sure the PC and RK3588 are in the same LAN, and the browser operation steps are the same as on the device.

10. View saved video streams

Enter the IP address of the RK3588 device in the browser, http://rk3588_ip:8080, and the following interface will appear.

Check 1, then click 2 to view the saved video stream, as shown above:

this picture is show how to use neardi LPA3588 build an NVR system 15